
Easy Twix Cookies

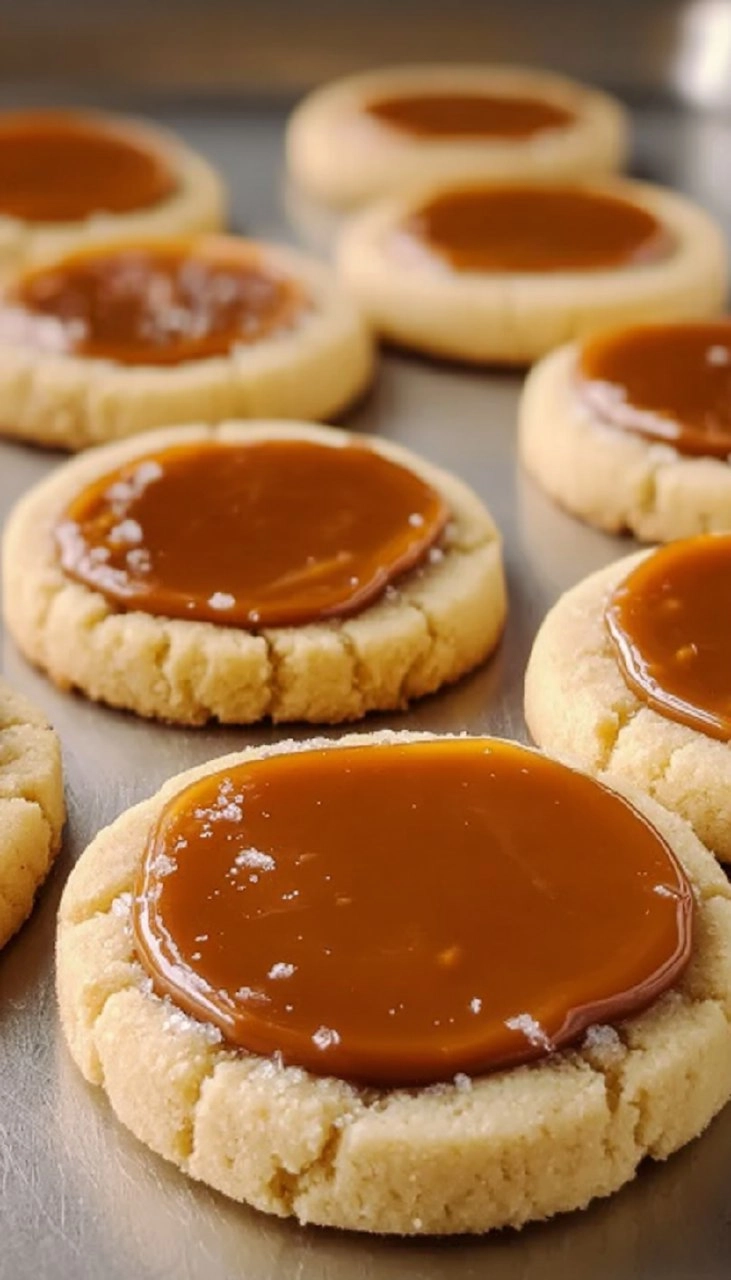
Easy Twix Cookies are the perfect treat for those who can’t resist the combination of buttery cookies, sweet caramel, and smooth chocolate. If you’ve ever fantasized about the iconic candy bar but yearned for a homemade version, this recipe is your solution. Imagine biting into a cookie that captures all of these rich flavors while being soft and chewy, creating an indulgent experience that’s surprisingly easy to make. Perfect for dessert tables, family gatherings, or just when that sweet craving kicks in, these cookies have both the nostalgic appeal and the luxury of homemade goodness.

When I first decided to try making cookies inspired by the Twix bar, I was skeptical about whether I could capture that beloved crunch and gooeyness. However, after a few experimental batches, I fine-tuned the ratios and steps. What I ended up with is a treat that’s not only decadent and satisfying but also a crowd-pleaser that will have your friends and family raving. Each bite melts in your mouth and brings back that familiar candy bar memory, but in a delightful, chewy cookie form. Trust me, once you make these, you won’t want to go back to store-bought.
Table of Contents
Why You’ll Love This Recipe
- Simple & Quick: These cookies take just about 30 minutes from start to finish.
- Irresistible Flavor: The balance of buttery cookie, creamy caramel, and rich chocolate delivers an unforgettable taste.
- Eye-Catching Appeal: With their layered appearance, they look as impressive as they taste, making them perfect for parties.
- Flexible Serving: Ideal for any occasion—whether it’s an afternoon snack, dessert for guests, or a sweet treat for the kids.
- Diet-Friendly Options: You can easily adapt this recipe with gluten-free ingredients for a wider audience.
Ingredients You’ll Need
- 1 1/2 cups butter, softened: Softened butter creates a rich, tender cookie. If you’re short on time, microwave it for a few seconds, but don’t melt it completely.
- 1 cup powdered sugar: Adds sweetness and helps create a tender crumb. You can substitute with granulated sugar if need be, but the texture will differ slightly.
- 1 1/2 teaspoons vanilla extract: This pure flavoring adds warmth and depth. Always go for pure vanilla over imitation for the best result.
- 3 cups all-purpose flour: The foundation of our cookie dough. For a gluten-free version, consider a one-to-one gluten-free flour blend.
- 1/4 teaspoon salt: Enhances sweetness and balances flavors. Don’t skip it!
- 11 ounces caramels (unwrapped): Provides that signature chewy texture. Soft caramels work best; you can also use caramel sauce in a pinch.
- 1 tablespoon evaporated milk or cream: Helps to melt the caramels into a sauce consistency. Heavy cream can be used for a richer flavor.
- 2 cups milk chocolate chips: Melts beautifully and gives that classic candy bar chocolate taste. Feel free to swap in dark chocolate for a richer bite.
- 2 teaspoons shortening: Gives the chocolate a glossy finish and helps it melt smoothly. You can skip it if you prefer pure chocolate.
How to Make Easy Twix Cookies
Prepare the Cookie Dough: In a large bowl, cream together 1 1/2 cups softened butter and 1 cup powdered sugar until light and fluffy. Mix in 1 1/2 teaspoons vanilla extract, ensuring it’s well incorporated. Gradually add in 3 cups all-purpose flour and 1/4 teaspoon salt, blending until a soft dough forms.
Shape the Cookies: Preheat your oven to 350°F (175°C). Scoop out tablespoon-sized portions of dough and roll them into balls. Place them on a parchment-lined baking sheet, leaving room for spreading.
Bake the Cookies: Bake in the preheated oven for 10-12 minutes, or until the edges are lightly golden. Allow the cookies to cool on the sheet for a few minutes before transferring them to a wire rack to cool completely.
Make the Caramel Filling: While the cookies are cooling, melt 11 ounces of unwrapped caramels with 1 tablespoon of evaporated milk in a saucepan over low heat. Stir continuously until smooth.
Assemble the Cookies: Once cooled, top each cookie with a generous spoonful of the caramel mixture. Allow it to set for a few minutes.
Melt the Chocolate Topping: In a microwave-safe bowl, combine 2 cups of milk chocolate chips with 2 teaspoons of shortening. Microwave in 30-second intervals until melted and smooth, stirring well.
Finish the Cookies: Drizzle or spread the melted chocolate over the caramel-topped cookies. Allow the chocolate to set before serving.
Storing & Reheating
To store your delicious Easy Twix Cookies, place them in an airtight container at room temperature for up to 5 days. If you’re planning to keep them for longer, transfer to the fridge, where they’ll last about a week. For longer storage, freeze the cookies in a single layer before transferring to a freezer-safe container. They can last up to 3 months in the freezer. When you’re ready to enjoy them, simply thaw at room temperature or warm them slightly in the microwave for about 10-15 seconds. Take note: the cookies may lose a bit of their texture when frozen, but a quick warm-up helps restore their deliciousness.
Chef’s Helpful Tips
- Always ensure your butter is softened to room temperature for a creamy dough. Cold butter won’t incorporate properly and may affect the texture.
- If you’re looking for that perfect caramel consistency, don’t rush the melting process—it’s better over low heat for an even melt.
- Avoid overbaking; you want the cookies soft since they’ll firm up a bit as they cool.
- For extra flavor, consider adding a sprinkle of sea salt on top of the chocolate drizzle before it sets.
- Feel free to incorporate chopped nuts or crushed cookies into the caramel layer for a fun twist.
When it comes to making cookies, embracing creativity can lead to delightful surprises. Easy Twix Cookies embody a simple approach with fantastic results. Allow yourself to tweak the recipe as needed, and don’t hesitate to have fun with it! Whether it’s adding a pinch of sea salt, trying dark chocolate, or even introducing flavored extracts, these little changes can elevate your cookie game. Each time you bake these, a new adventure awaits, so gather your ingredients and enjoy this delicious experience!
Recipe FAQs
Can I use light butter instead of regular butter?
What can I substitute for caramels if I can’t find them?
How do I know when my cookies are done baking?
Can I freeze the unbaked cookie dough?
⭐ If you make my Easy Twix Cookies recipe, Awesome! I would love to hear from you. Please give it a star rating and review below! 👇

Easy Twix Cookies
These Easy Twix Cookies are a delightful treat with a buttery cookie base, gooey caramel, and rich chocolate topping. Quick to prepare and beautifully delicious, perfect for any gathering or a sweet snack at home.
- Prep Time 20 minutes
- Cook Time 12-13 minutes
- Yield 24 cookies 1x
Ingredients
- 1 1/2 cups butter softened
- 1 cup powdered sugar
- 1 1/2 teaspoons vanilla extract
- 3 cups all purpose flour
- 1/4 teaspoon salt
- 11 ounces caramels (unwrapped)
- 1 tablespoon evaporated milk or cream
- 2 cups milk chocolate chips
- 2 teaspoons shortening
Instructions
- Preheat the oven to 350 degrees F and line a sheet pan with parchment paper or a nonstick baking mat.
- In a mixer, beat the softened butter until light and fluffy. Then add the powdered sugar and mix until well combined.
- In the same bowl, add the vanilla extract, flour, and salt. Mix until the ingredients form a dough.
- Wrap the dough in plastic wrap and chill in the freezer for 20 minutes.
- Flour a work surface and roll the chilled dough out to a 1/2 inch thickness.
- Use a 2 or 3 inch round cookie cutter to cut out cookies and place them 1 inch apart on the prepared baking sheet.
- Bake the cookies for 12-13 minutes or until the edges are light brown, then repeat with any remaining dough.
- Cool the cookies on a wire rack.
- In a separate bowl, combine the caramels and evaporated milk. Microwave in 45 second increments until melted and stir until smooth.
- Spoon a generous amount of caramel onto each cookie and spread it to the edges with the back of the spoon.
- Allow the cookies to rest for about 20 minutes until the caramel firms up.
- In another bowl, combine the milk chocolate chips and shortening. Microwave in 30 second increments until melted and stir until smooth.
- Spread a spoonful of melted chocolate over each cookie, covering the caramel layer.
- Let the cookies sit until the chocolate has hardened, then serve.
Notes
For best results, ensure the butter is softened at room temperature before mixing.
You can substitute the milk chocolate chips with dark chocolate if you prefer a richer flavor.
These cookies are best enjoyed fresh but can be stored in an airtight container for a few days.
Nutrition
- Serving Size: 1 cookie
- Calories: 250
- Sugar: 20g
- Sodium: 100mg
- Fat: 12g
- Saturated Fat: 7g
- Unsaturated Fat: 4.5g
- Trans Fat: 0g
- Carbohydrates: 33g
- Fiber: 1g
- Protein: 2g
- Cholesterol: 30mg
Nutritional information is an estimate. The nutritional values for your final dish may vary based on measuring differences and products used.