
Pumpkin Truffles

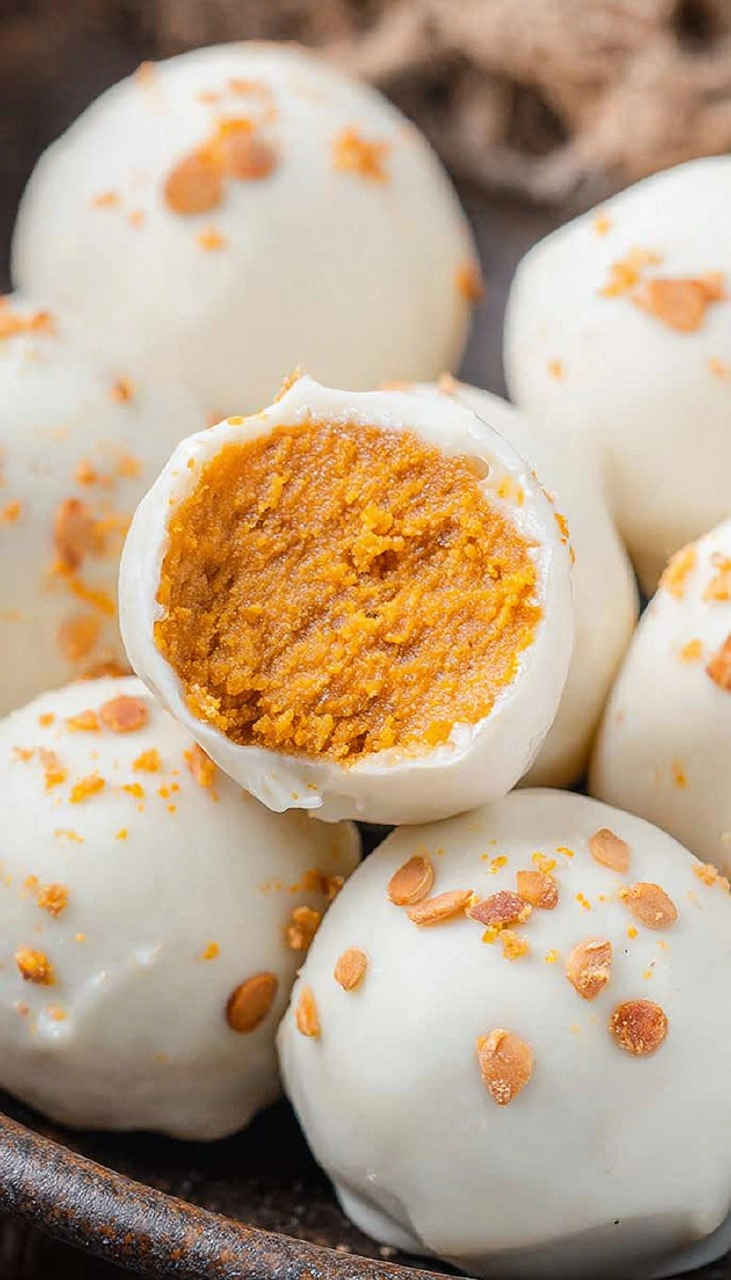
Pumpkin Truffles are a delightful fusion of creamy pumpkin and sweet white chocolate, perfect for fall celebrations or simply as a homemade treat. The moment you bite into one, you experience the smoothness of cream cheese mingling with the warm, autumnal spices like cinnamon and nutmeg, creating a rich, velvety texture that melts in your mouth. These truffles are not only delicious, but they’re also incredibly easy to prepare. Without any baking required, they’re perfect for novice cooks or anyone looking to whip up a quick, no-fuss dessert.
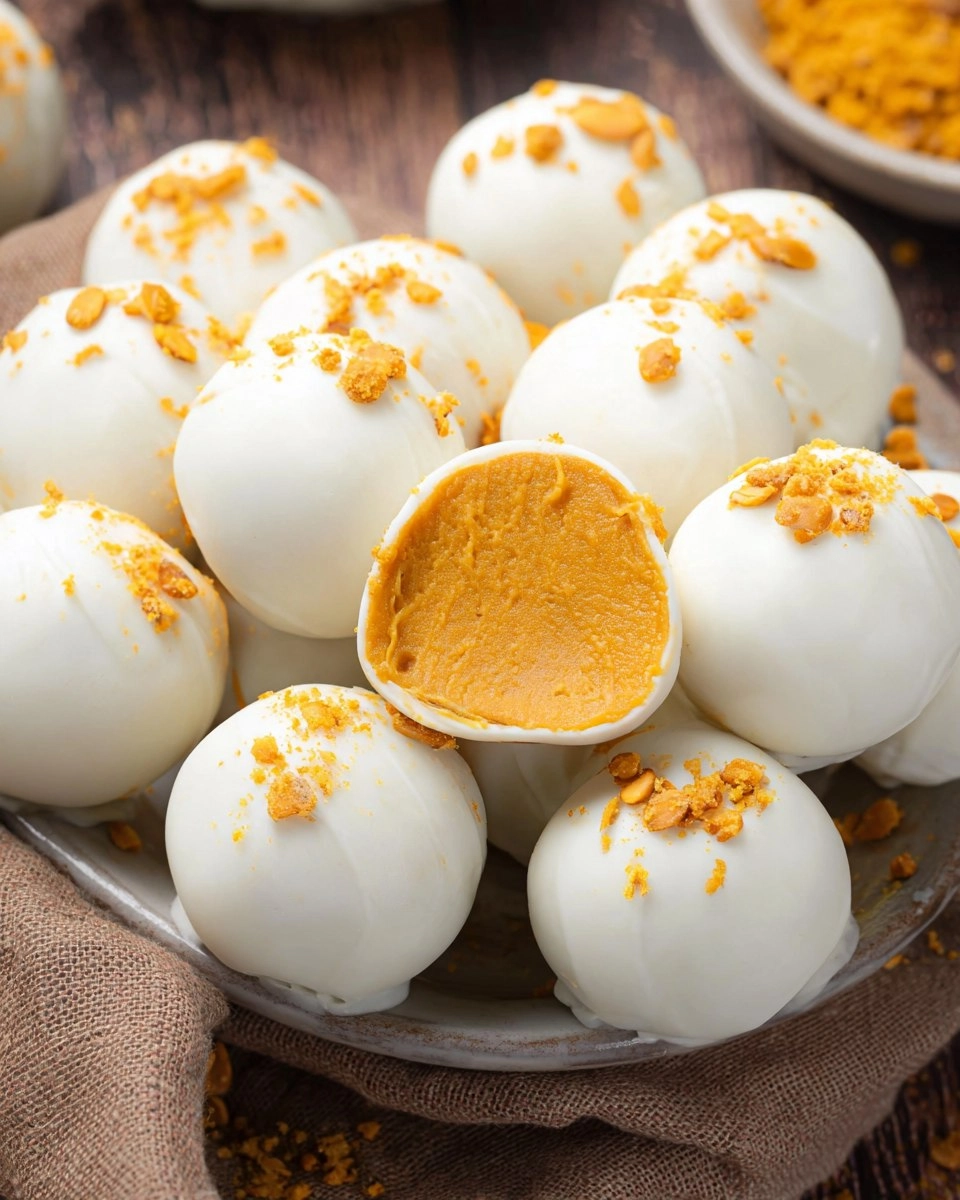
I still remember the first time I made Pumpkin Truffles for a family gathering. The mixture of the colors and textures, along with that nostalgic pumpkin spice aroma wafting through the kitchen, hooked everyone instantly. It became a hit—and for good reason. These truffles are a beautiful representation of seasonal flavors, bringing together the sweetness of white chocolate and the earthiness of pumpkin. They’re bound to impress your friends and family, so roll up your sleeves and let’s get started!
Table of Contents
Why You’ll Love This Recipe
- Simple & Quick: You can whip these truffles up in just a few easy steps—no baking required!
- Irresistible Flavor: Creamy pumpkin mixed with warm spices topped with white chocolate feels like a warm hug.
- Eye-Catching Appeal: Their adorable round shape and festive dusting make for a stunning treat.
- Flexible Serving: Perfect for any occasion—be it a cozy movie night, holiday party, or even as a sweet snack!
- Diet-Friendly Options: You can easily find gluten-free graham crackers or even make variations that cater to dietary needs.
Ingredients You’ll Need
- 4 ounces cream cheese: Make sure it’s softened for the right creamy texture. This holds everything together and adds richness.
- 2 tablespoons powdered sugar: This adds sweetness without being overwhelming, providing that gentle hint of sugary goodness.
- 1/3 cup pure pumpkin puree: Use pure pumpkin puree rather than pumpkin pie filling for better control over flavor and sweetness.
- 1 ¾ cups finely ground graham cracker crumbs: This mimics the flavors of a crust and gives structure to the truffles. About 10-11 sheets should do.
- 1 teaspoon pumpkin pie spice: This is essential for that classic autumn flavor, blending cinnamon, nutmeg, and ginger.
- ½ teaspoon cinnamon: Additional depth of flavor enhances the pumpkin’s natural sweetness.
- 12 ounces white chocolate chips: The creamy, sweet chocolate coating adds an indulgent finish over the pumpkin mixture.
- Optional: extra graham cracker crumbs or English toffee bits: For dusting on top, these add a nice crunch and visual appeal.
How to Make Pumpkin Truffles
- Cream the Base: Start by adding the softened cream cheese and powdered sugar to a mixing bowl. Beat them together with a stand or hand mixer until the mixture is creamy and smooth.
- Mix in the Pumpkin: Add the 1/3 cup of pure pumpkin puree and ½ teaspoon of cinnamon. Mix at medium speed until everything is fully combined and smooth.
- Combine the Dry Ingredients: Now, add the 1 ¾ cups of finely ground graham cracker crumbs and 1 teaspoon of pumpkin pie spice. Blend on medium until the mixture is thick and thoroughly combined. This should take about 1-2 minutes.
- Chill the Mixture: Transfer the dough into a small bowl, cover it up, and refrigerate for about 2 hours. Allowing the mixture to chill makes it easier to form into truffles.
- Prep the Baking Sheet: Meanwhile, prepare a baking sheet by lining it with parchment paper to prevent sticking.
- Shape into Balls: After chilling, scoop a tablespoon of the dough and roll it into a uniform ball, approximately 1 inch in diameter. Place these on the baking sheet, ensuring they are about 2 inches apart. This recipe typically makes about 20 truffles.
- Final Chill: Cover the truffles again and chill for another 20-25 minutes before dipping.
- Melt the Chocolate: In a microwave-safe bowl, add the 12 ounces of white chocolate chips. Microwave at 100% power in 10-15 second intervals, stirring in between until the chocolate is fully melted and smooth—be careful not to overheat!
- Coat the Truffles: Remove the truffles from the fridge and, using a fork, dip each one into the melted chocolate, ensuring it’s fully coated.
- Drain Excess Chocolate: Lift each truffle with the fork and gently scrape the bottom against the bowl to remove extra chocolate.
- Place Back on the Sheet: Use another fork to slide the truffles onto the prepared baking sheet while keeping the sides clean.
- Repeat Dipping: Continue the process until all truffles are coated. You may need to reheat the chocolate if it starts to cool and thicken.
- Add Decoration: Immediately sprinkle English toffee bits or graham cracker crumbs on top of each truffle while the coating is still wet.
- Let Set: Allow the truffles to sit until the chocolate hardens into a crisp shell.
- Final Chill: For the best results, place the truffles back into the refrigerator to fully set before serving. They can sit at room temperature for a few hours if you plan to enjoy them soon.
Storing & Reheating
Once your Pumpkin Truffles are set, store them in an airtight container at room temperature for up to two days. For longer storage, keep them in the fridge for about one week, or you can freeze them in a freezer-safe container for up to three months. Just let them thaw in the refrigerator overnight when you’re ready to enjoy. Keep in mind, while the texture may slightly change, the flavor will remain delightful, making them just as enjoyable!
Chef’s Helpful Tips
- Check the Cream Cheese: Make sure it’s at room temperature for a smooth mixture; cold cream cheese can result in lumps.
- Do Not Overheat Chocolate: Microwave in small intervals and stir often to avoid burnt chocolate—it’s key to achieving that silky smooth coating.
- Chill for Firmness: If your dough seems too soft to roll into balls, give it more time in the refrigerator. It’ll help create a better shape.
- Play with Coatings: Experiment with other toppings like crushed nuts or colored sprinkles for a fun touch!
Pumpkin Truffles will surely become a favorite in your dessert repertoire. With their creamy, spiced center and delicate chocolate coating, they embody the autumn spirit in the finest form. Don’t hesitate to play around with flavors— perhaps add a pinch of nutmeg or a drizzle of caramel. The world of truffles is your oyster, so go ahead and enjoy these delightful bites!
Recipe FAQs
Can I use store-bought pumpkin puree?
How long do these truffles last?
Can I substitute the white chocolate for another kind?
What if my chocolate isn’t melting properly?
⭐ If you make my Pumpkin Truffles recipe, Awesome! I would love to hear from you. Please give it a star rating and review below! 👇
Pumpkin Truffles
These pumpkin truffles offer a delightful combination of cream cheese and pumpkin puree, covered in smooth white chocolate. A simple and delicious treat perfect for any occasion!
- Prep Time 10 minutes
- Cook Time 40 minutes
- Yield 20 truffles 1x
Ingredients
- 4 ounces cream cheese, softened
- 2 tablespoons powdered sugar
- 1/3 cup pumpkin puree
- 1 ¾ cups finely ground graham cracker crumbs
- 1 teaspoon pumpkin pie spice
- ½ teaspoon cinnamon
- 12 ounces white chocolate chips
- optional: extra graham cracker crumbs or English toffee bits
Instructions
- Beat the softened cream cheese and powdered sugar in a mixing bowl until creamy and smooth.
- Add pumpkin puree and cinnamon; mix at medium speed until well combined.
- Incorporate graham cracker crumbs and spices, mixing until smooth and thick, about 1-2 minutes.
- Transfer the mixture to a bowl, cover, and refrigerate for about 2 hours or longer if needed.
- Prepare a baking sheet lined with parchment paper.
- Scoop a tablespoon of dough, roll it into a ball, and place it on the baking sheet, repeating with the remaining dough. Place truffles 2 inches apart.
- Chill the rolled truffles for 20-25 minutes.
- Melt the white chocolate chips in a microwave-safe bowl, heating in 10-15 second intervals.
- Remove chilled truffles and dip each into melted chocolate using a fork to ensure full coverage.
- Let excess chocolate drip off by scraping the bottom of the fork against the bowl.
- Place the truffles on the baking sheet and sprinkle the tops with crumbs or toffee bits before they set.
- Return the truffles to the refrigerator to fully set before serving.
Notes
Feel free to experiment with different toppings like nuts or sprinkles.
Make sure the chocolate is melted smoothly to avoid clumping.
These truffles can be stored in the fridge for up to a week.
Nutrition
- Serving Size: 1 truffle
- Calories: 180
- Sugar: 15g
- Sodium: 50mg
- Fat: 9g
- Saturated Fat: 5g
- Unsaturated Fat: 3g
- Trans Fat: 0g
- Carbohydrates: 24g
- Fiber: 1g
- Protein: 2g
- Cholesterol: 15mg
Nutritional information is an estimate. The nutritional values for your final dish may vary based on measuring differences and products used.