
Oreo Icebox Cake

Oreo Icebox Cake is a delightful dessert that captures the essence of creamy, chocolatey indulgence in an effortless manner. This chilled treat layers luscious whipped cream with Oreo cookies, transforming these beloved biscuits into something truly special. The combination is rich yet balanced, making every chilled slice an instant hit at any gathering.
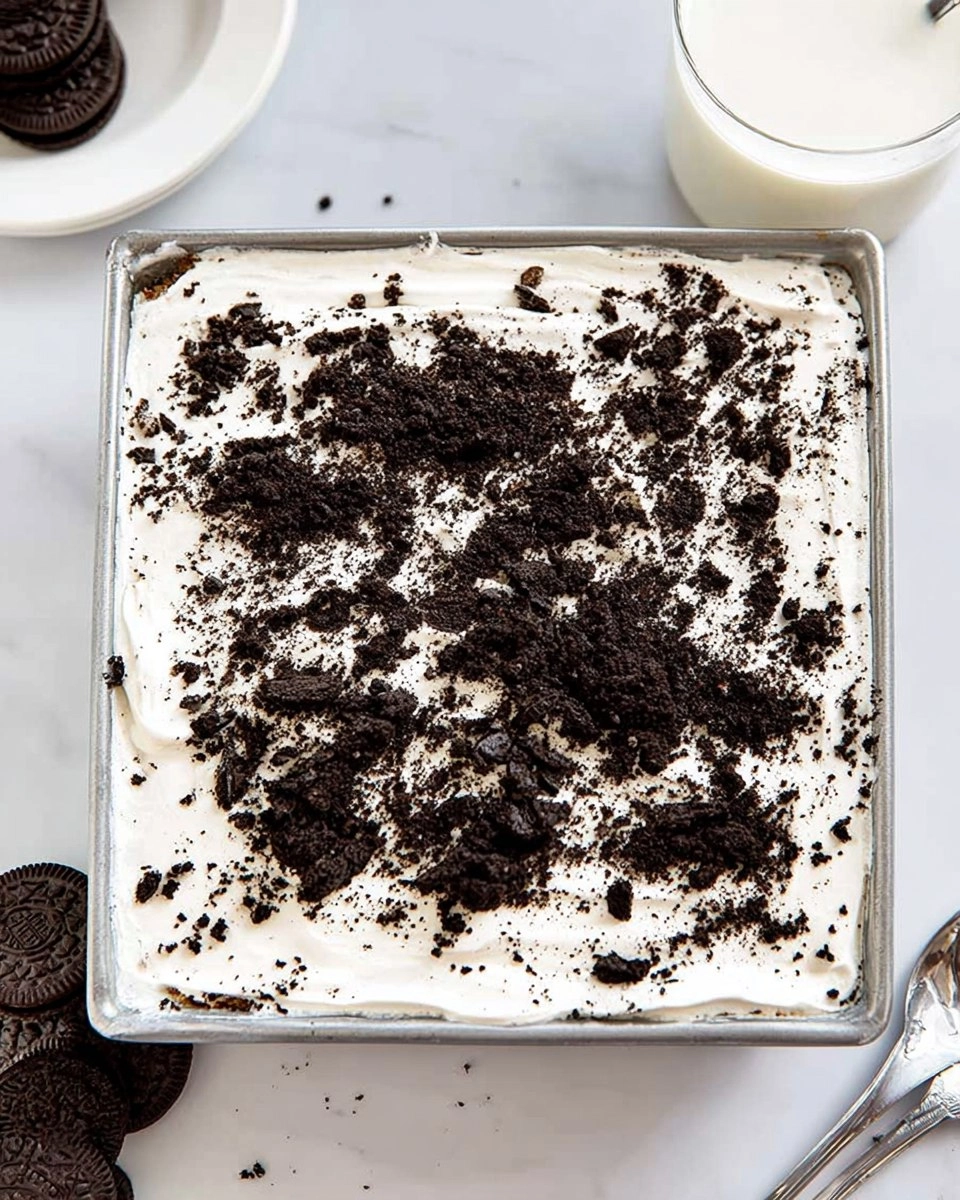
When I first stumbled upon this recipe, it was one of those magical kitchen moments where simplicity met deliciousness. I remember bringing it to a friend’s barbecue, and by the time the sun set, the entire pan had mysteriously vanished. This dessert, my friends, works its charm like no other, and it’s incredibly easy to whip up. Trust me, once you try making Oreo Icebox Cake, it will become a go-to recipe for any occasion, whether it’s a family dinner or a casual gathering with friends. You absolutely have to give it a try!
Table of Contents
Why You’ll Love This Recipe
- Simple & Quick: You can whip this up in about 30 minutes, with just a little waiting time before it’s ready to enjoy.
- Irresistible Flavor: The blend of creamy whipped cream and crunchy cookies creates a heavenly taste explosion.
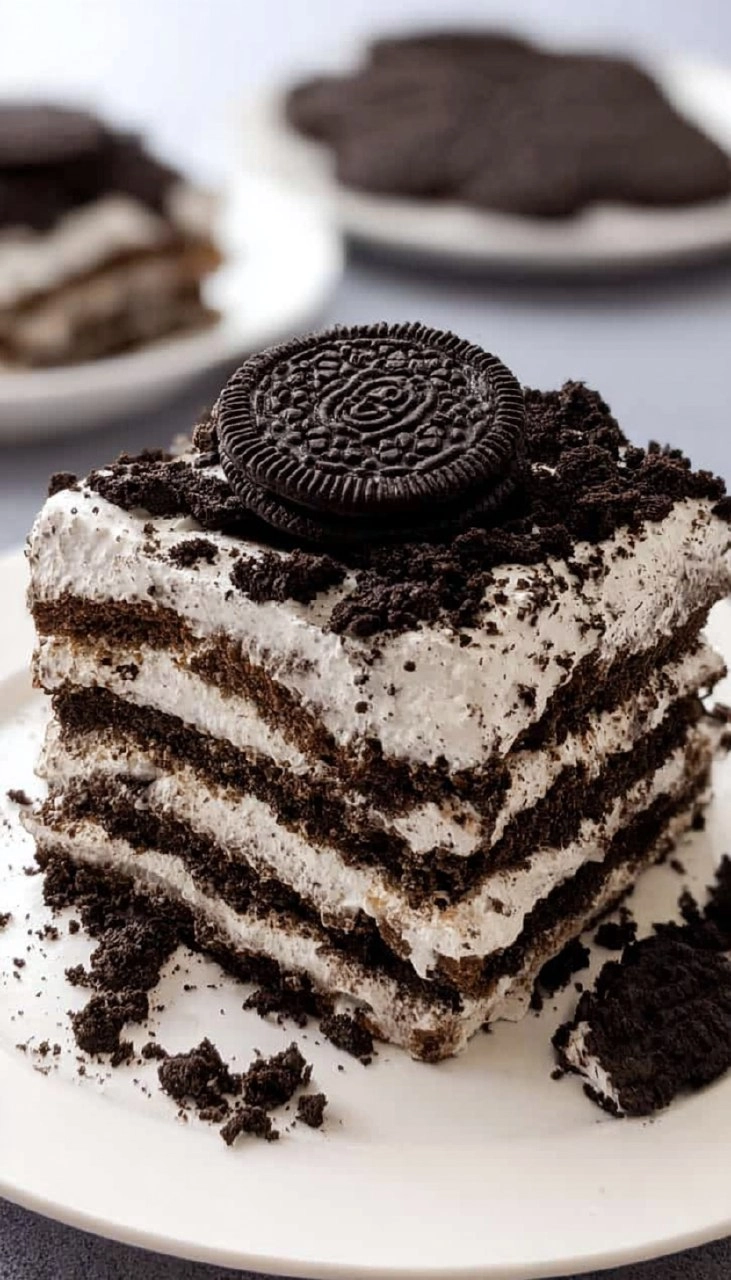
- Eye-Catching Appeal: With its beautiful layers and dusting of crushed Oreos on top, it’ll impress anyone who sees it.
- Flexible Serving: Perfect for any occasion—whether it’s a summer barbecue, holiday gathering, or just a cozy night in.
- Diet-Friendly Options: You can easily adapt it to be gluten-free by using gluten-free Oreo cookies.
Ingredients You’ll Need
- 48 Oreo cookies: The star of the show! These provide the chocolatey crunch and flavor. Feel free to use Double Stuf Oreos for extra creaminess.
- 4 ounces cream cheese, softened: This adds a subtle tang and richness to the whipped cream layer. Be sure to let it soften for easy mixing.
- 2 ½ cups heavy whipping cream, cold: Essential for whipping up that light and airy texture. It’s best to chill your mixing bowl for extra fluffy results.
- ½ cup confectioners’ sugar: A must for sweetening the whipped cream. You can adjust the amount to suit your taste.
- 1 teaspoon vanilla extract: This elevates the flavor profile and adds warmth to the dessert.
- Crushed Oreo cookies: For that delightful crunch on top—just crush them lightly so you get a nice sprinkle.
How to Make Oreo Icebox Cake
- Chill the Mixer: Start by placing the bowl of a stand mixer along with its whisk attachment in the freezer for 15 to 20 minutes. A cold bowl helps achieve those perfect stiff peaks.
- Beat Cream Cheese: In your chilled bowl, beat the softened cream cheese until it’s smooth and creamy.
- Combine Whipped Cream Mixture: Gradually add in 2 ½ cups of cold heavy whipping cream, ½ cup of confectioners’ sugar, and 1 teaspoon of vanilla extract. Whip on medium-high speed until stiff peaks form. Be careful not to overbeat; you want it creamy, not grainy.
- Add Base Layer: Spread a thin layer of the whipped cream mixture evenly into the bottom of an 8×8-inch baking dish. This acts as a nice base for the cookies.
- Layer the Cookies: Arrange a single layer of Oreo cookies over the whipped cream. Feel free to break up a few cookies to fit perfectly in your dish.
- First Layer of Whipped Cream: Spread about one-third of the remaining whipped cream mixture evenly over the cookies. It should cover them completely.
- Repeat Layers: Repeat the layering process two more times, always ending with a generous layer of whipped cream on top.
- Top with Crushed Oreos: Sprinkle crushed Oreo cookies across the top layer of whipped cream for added texture and flavor.
- Chill the Cake: Cover the dish tightly and place it in the refrigerator for at least 6 to 8 hours—overnight is even better! This chilling time allows the cookies to soften, creating a cake-like texture.
- Serve Cold: When you’re ready to serve, cut into squares. For the cleanest slices, pop the cake in the freezer for 20 to 30 minutes before cutting.
Storing & Reheating
To store your Oreo Icebox Cake, keep it tightly covered in the refrigerator. It will last up to 4 days and the flavors will only develop further! If you want to make it in advance, you can also freeze it for up to 3 months. Just be sure to wrap it well to prevent freezer burn. To refresh it, let it sit at room temperature for a bit before serving, as freezing may change the texture.
Chef’s Helpful Tips
- Don’t Overbeat the Cream: Keep an eye on those peaks. Overwhipping can lead to a grainy texture. Stop just as they form stiff peaks.
- Room Temp Ingredients: Make sure your cream cheese is sufficiently softened; it blends better with the whipped cream.
- Chill Your Bowl and Whisk: This small step makes a huge difference in achieving that light and airy whipped cream.
- Customize Toppings: Feel free to swap out or add toppings like chopped nuts, chocolate shavings, or even fresh fruit.
- Make-Ahead Magic: This dessert is a perfect make-ahead option for parties or get-togethers, allowing you to spend more time enjoying the company.
Don’t hesitate to share your unique twists on this recipe, whether it’s using different kinds of cookies or adding extra layers of flavor—experimenting is part of the fun!
Recipe FAQs
Can I use lighter cream options?
Yes, you can use heavy cream alternatives, like half-and-half, but the texture may not be as rich. Full-fat heavy cream gives the best results for number of layers.
How long should I chill the cake?
For the best texture, chill your Oreo Icebox Cake for at least 6 to 8 hours, but overnight is optimal if you can wait!
Can I make this gluten-free?
Absolutely! Just swap the regular Oreo cookies with gluten-free ones, and you’re all set for a delightful treat that everyone can enjoy.
How do I store leftovers?
Store any leftover cake in the refrigerator, covered with plastic wrap or foil. It will stay good for up to 4 days, but trust me, it’s unlikely there will be much left!
So there you have it! This Oreo Icebox Cake is sure to become a new favorite for its ease and flavor. Grab those Oreo cookies, and may your kitchen be filled with joy as you create this timeless treat! Enjoy!
Print
⭐ If you make my Oreo Icebox Cake recipe, Awesome! I would love to hear from you. Please give it a star rating and review below! 👇
Oreo Icebox Cake
This Oreo Icebox Cake features layers of creamy whipped mixture and crunchy Oreo cookies. It’s simple to prepare and perfect for serving guests or enjoying a sweet treat at home.
- Prep Time 15 minutes
- Cook Time 8 hours
- Yield 9 servings 1x
Ingredients
- 48 oreo cookies
- 4 ounces cream cheese, softened
- 2 ½ cups (595 g) heavy whipping cream, cold
- ½ cup (62.5 g) confectioners' sugar
- 1 teaspoon vanilla extract
- Crushed Oreo cookies
Instructions
- Chill the bowl and whisk attachment of a stand mixer in the freezer for 15 to 20 minutes.
- In the chilled bowl, beat the cream cheese until smooth. Add the heavy whipping cream, confectioners’ sugar, and vanilla extract. Beat on medium-high speed until stiff peaks form, being careful not to overbeat.
- Spread a thin layer of the whipped cream mixture into the bottom of an 8×8-inch baking dish.
- Arrange a layer of Oreo cookies over the whipped cream, breaking cookies if necessary to fit.
- Spread about one-third of the remaining whipped cream mixture over the cookies evenly.
- Repeat the layers two more times, finishing with a final layer of whipped cream on top.
- Sprinkle crushed Oreo cookies over the top.
- Cover tightly and refrigerate for at least 6 to 8 hours or overnight for best results.
- Serve cold and for cleaner slices, freeze for 20 to 30 minutes before cutting.
Notes
For a richer flavor, let the cake chill overnight.
Use full-fat cream cheese for better texture.
Feel free to substitute regular Oreos with double-stuffed or other flavors.
Nutrition
- Serving Size: 1 slice
- Calories: 360
- Sugar: 22g
- Sodium: 270mg
- Fat: 24g
- Saturated Fat: 15g
- Unsaturated Fat: 6g
- Trans Fat: 0g
- Carbohydrates: 34g
- Fiber: 1g
- Protein: 5g
- Cholesterol: 80mg
Nutritional information is an estimate. The nutritional values for your final dish may vary based on measuring differences and products used.