Blackberry Scones

Blackberry scones are the perfect treat for those who crave something warm, buttery, and slightly sweet, with a burst of juicy tartness. They are a delightful blend of flaky pastry and fresh blackberries that will make your kitchen smell heavenly as they bake. You’ll find that this recipe strikes the ideal balance between tender and crumbly, which is precisely what makes a scone so special. Whether paired with a cup of coffee or enjoyed as a delightful afternoon snack, these scones are sure to satisfy your sweet tooth.
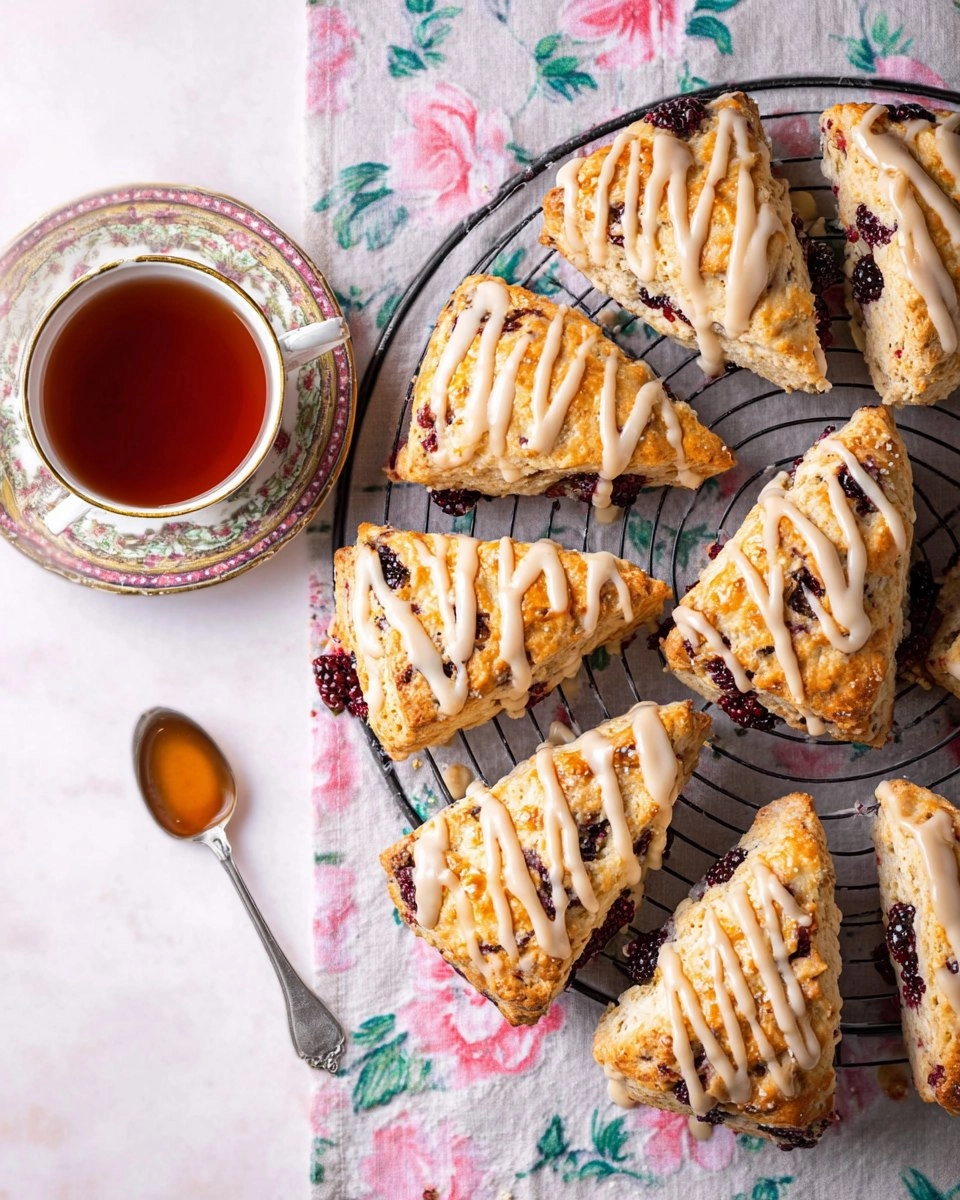
I first fell in love with blackberry scones on a charming summer day during a visit to a local bakery. The delicate texture and vibrant flavor made an impression that lingered long after that first bite. When I discovered how simple it is to replicate that magic at home, I couldn’t resist making them for family and friends. These scones are not only delicious but also easy to throw together, making them a staple in my baking repertoire. I cannot wait for you to try this recipe!
Table of Contents
Why You’ll Love This Recipe
- Simple & Quick: Whip up these scones in under 30 minutes, perfect for those busy mornings.
- Irresistible Flavor: You’ll savor the buttery richness paired with the sweet-tart freshness of blackberries.
- Eye-Catching Appeal: The lovely purple bursts in each scone are as delightful to look at as they are to taste.
- Flexible Serving: Enjoy them at breakfast, with tea, or as a midday treat that everyone will love.
- Diet-Friendly Options: Options for gluten-free flour can make these accessible for those with dietary restrictions.
Ingredients You’ll Need
- 2 cups all-purpose flour: Provides the main structure of the scones. You can substitute with a gluten-free blend if desired.
- ¼ cup granulated sugar: Adds sweetness for a lovely flavor contrast. You can use coconut sugar for a lower-glycemic option.
- 2 teaspoons baking powder: This leavens the scones, giving them that delightful rise. Make sure it’s fresh for best results.
- ½ teaspoon baking soda: Works in conjunction with the baking powder to create a fluffy texture.
- ½ teaspoon salt: Balances the sweetness and enhances overall flavor.
- ½ cup cold butter, diced: Creates a tender, flaky texture when cut into the dough. Keep it cold for the best results, or try using plant-based butter for a dairy-free version.
- 1 cup fresh blackberries: The star ingredient, providing bursts of flavor. Feel free to substitute with frozen blackberries, though adjust baking time accordingly.
- ⅔ cup buttermilk: Adds rich moisture and a slight tang to the scones. You can make a quick substitute using regular milk and a splash of vinegar or lemon juice.
- 1 tablespoon vanilla extract: Enhances the sweetness and depth of flavor. Use pure extract for the best taste.
- Egg wash: A mixture of whisked egg and water brushed on top before baking to create a golden finish.
- 1 cup powdered sugar: For the glaze, adding sweetness and a nice shine. Sift well to avoid lumps.
- 3 tablespoons melted butter: This adds richness to the glaze to complement the scones.
- 1 teaspoon vanilla bean paste: For a hint of vanilla flavor and visual appeal, though it can be replaced with additional vanilla extract.
- 1-2 tablespoons milk: Adjust the consistency of the glaze to your preference.
How to Make Blackberry Scones
- Preheat your oven: Set it to 375°F (190°C), and prepare a baking sheet lined with parchment paper. This ensures even baking and easy removal.
- Mix dry ingredients: In a large bowl, combine 2 cups all-purpose flour, ¼ cup granulated sugar, 2 teaspoons baking powder, ½ teaspoon baking soda, and ½ teaspoon salt. Whisk to aerate and combine.
- Incorporate the butter: Add ½ cup cold diced butter. Use a pastry blender or your fingers to rub the butter into the flour mixture until it resembles coarse crumbs.
- Add blackberries: Carefully toss in 1 cup fresh blackberries, making sure to coat them with flour to prevent them from sinking.
- Combine wet ingredients: In a small jug, mix ⅔ cup buttermilk and 1 tablespoon vanilla extract. Pour this mixture into the dry ingredients, and gently stir until just combined.
- Form the dough: Turn the dough out onto your prepared baking sheet. Press it into a circle, about 1-inch thick and approximately 7 inches in diameter.
- Cut and separate: Use a sharp knife to cut the circle into 8 wedges and gently part them for even baking.
- Brush and bake: Apply an egg wash to the tops of the scones for a shiny finish. Bake for 20-22 minutes, or until they are a beautiful golden brown and feel firm to the touch.
- Prepare the glaze: In a separate bowl, whisk together 1 cup powdered sugar, 3 tablespoons melted butter, 1 teaspoon vanilla bean paste, and 1 tablespoon milk until you achieve a pourable consistency. Add more milk if needed.
- Glaze the scones: Once the scones have cooled completely on a wire rack, drizzle the glaze on top and allow it to set for approximately 10 minutes.
Storing & Reheating
To enjoy your blackberry scones at their best, store any leftovers in an airtight container at room temperature for up to two days. For longer storage, consider refrigerating them in a sealed container for up to a week. You can also freeze scones for up to three months, wrapped tightly in plastic wrap and then placed in a freezer-safe bag. When ready to serve, reheat them in an oven set to 350°F (175°C) for about 8-10 minutes, which helps restore their flaky texture.
Chef’s Helpful Tips
- Avoid overworking the dough; just mix until combined for best texture.
- Keep your butter cold to ensure flaky layers develop during baking.
- If your scones are too crumbly, consider adding a touch more buttermilk to bring them together.
- For a flavor boost, consider adding lemon zest or almond extract into the dough.
- You can also fold in chocolate chips or pecans for a delicious twist on this recipe.
Enjoying a plate of warm blackberry scones fresh from the oven is a delightful experience that truly elevates any gathering. They remind us of simple pleasures and the joy of sharing something homemade with loved ones. Don’t hesitate to play around with ingredients and make this recipe your own. Whether you decide to add fresh herbs or exchange types of berries, each bite can hold a surprise.
Recipe FAQs
Can I use frozen blackberries in this recipe?
What can I substitute for buttermilk?
How do I know when my scones are done baking?
Can I make the dough ahead of time?
⭐ If you make my Blackberry Scones recipe, Awesome! I would love to hear from you. Please give it a star rating and review below! 👇

Blackberry Scones
These Blackberry Scones are a delightful blend of flavor and simplicity. Made with fresh blackberries, butter, and buttermilk, they create a perfect treat for any occasion, whether it’s a cozy breakfast or a delightful snack. Easy to prepare and irresistibly tasty, these scones will impress anyone looking for a homemade touch.
- Prep Time 20 minutes
- Cook Time 22 minutes
- Yield 8 scones 1x
Ingredients
- 2 cups (10 oz/284 g) all-purpose flour
- ¼ cup (2 oz/57 g) granulated sugar
- 2 teaspoons baking powder
- ½ teaspoon baking soda
- ½ teaspoon salt
- ½ cup (4 oz/115 g) butter, cold and diced
- 1 cup (5 oz/142 g) fresh blackberries, cut into halves (or left whole if small)
- ⅔ cup (5 fl oz/150 ml) buttermilk
- 1 tablespoon vanilla extract
- egg wash
- 1 cup (4 oz/115 g) powdered sugar, sifted
- 3 tablespoons (1 ½ oz/45 g) butter, melted
- 1 teaspoon vanilla bean paste
- 1-2 tablespoons milk
Instructions
- Preheat the oven to 375°F (190°C) and line a baking sheet with parchment paper. Set aside.
- In a large bowl, mix together flour, sugar, baking powder, baking soda, and salt.
- Using a pastry blender or your fingers, rub the cold diced butter into the flour mixture until it resembles coarse breadcrumbs. Fold in the blackberries.
- In a small jug, combine the buttermilk and vanilla extract, then pour it into the flour mixture. Stir gently until the dough starts to form.
- Transfer the dough onto the prepared baking sheet and shape it into a circle about 1-inch thick and 7 inches in diameter.
- Slice the circle into 8 wedges and gently separate them for baking.
- Brush the tops with egg wash and bake for 20-22 minutes, until golden brown and firm to the touch. Let cool completely on a wire rack.
Notes
For added sweetness, drizzle with a vanilla glaze after baking.
Make sure the butter is cold for the best texture in your scones.
Feel free to substitute blackberries with other berries or fruits.
Nutrition
- Serving Size: 1 scone
- Calories: 210
- Sugar: 8g
- Sodium: 200mg
- Fat: 10g
- Saturated Fat: 6g
- Unsaturated Fat: 4g
- Trans Fat: 0g
- Carbohydrates: 28g
- Fiber: 1g
- Protein: 3g
- Cholesterol: 30mg
Nutritional information is an estimate. The nutritional values for your final dish may vary based on measuring differences and products used.