
Icebox Cake

Icebox Cake is one of those classic desserts that just makes you swoon. It’s refreshingly simple yet incredibly satisfying, combining soft, creamy layers with the irresistible crunch of Oreos. Each bite melts in your mouth as the cookies soften from the milk, resulting in a delightful treat that’s perfect for any occasion. Whether you’re celebrating a birthday, hosting a special dinner, or simply satisfying a sweet tooth, this dessert is sure to steal the spotlight without breaking a sweat in the kitchen.
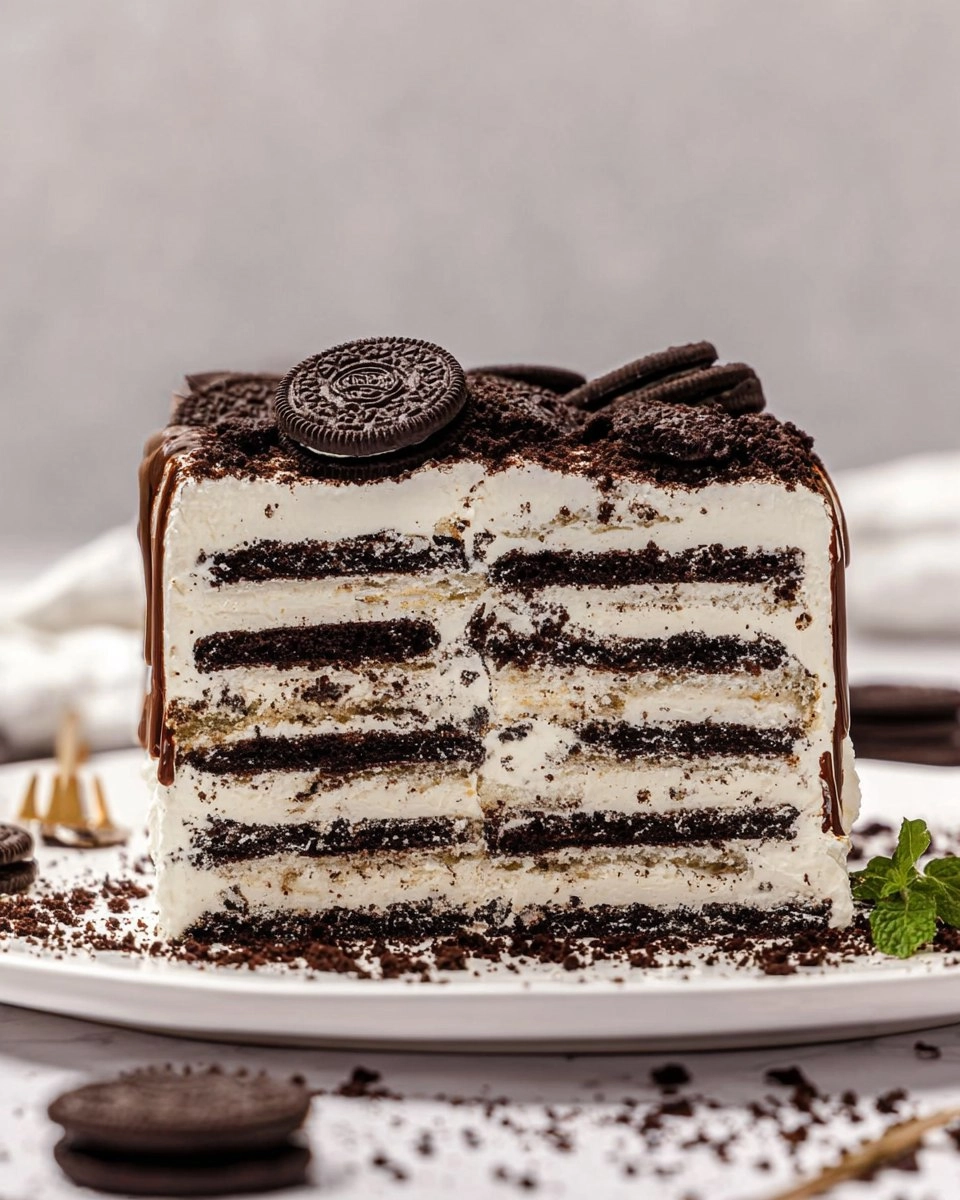
I remember the first time I made Icebox Cake at a family gathering. I wanted something easy to whip up that everyone would love. Little did I know, this crowd-pleaser would be the highlight of the day. Friends and family gathered around, raving about the layers of Cool Whip and Oreos. Not only is it a breeze to prepare, but its flavor combination has a nostalgic appeal that connects us all. And the best part? No baking required! I can’t wait for you to try it; trust me, your guests will be coming back for seconds.
Table of Contents
Why You’ll Love This Recipe
- Simple & Quick: It takes only a few minutes to prepare—perfect for last-minute gatherings!
- Irresistible Flavor: The creamy Cool Whip blends perfectly with the chocolatey crunch of Oreos for an unforgettable taste.
- Eye-Catching Appeal: This layered dessert looks impressive on any table, inviting everyone to dig in.
- Flexible Serving: Ideal for summer picnics, potlucks, or just a sweet treat at home.
- Diet-Friendly Options: You can easily make it gluten-free by opting for gluten-free Oreo alternatives.
Ingredients You’ll Need
- 2 cups (473ml) milk: Used to soften the Oreos, allowing them to meld beautifully with the Cool Whip. You can substitute almond milk or coconut milk for a dairy-free option.
- 3 (8oz) containers Cool Whip: This whipped topping adds a light, creamy texture. Look for dairy-free varieties if needed.
- 2 (18.12oz) packages Oreos, family size: The stars of this dessert! Use regular or double-stuffed Oreos depending on your preference, or even gluten-free options.
- Additional Oreos, chocolate sauce or chocolate shavings for decoration: These are optional for a fun finishing touch, adding visual appeal as well as a bit of extra flavor.
How to Make Icebox Cake
- Prepare the Platter: On a serving platter, spread a small amount of Cool Whip in a rectangular shape—this will help hold the first layer in place.
- Dip the Oreos: Pour the milk into a container. You’ll dip each Oreo in the milk before assembling to soften them. This is a crucial step so the cookies will not remain crunchy after chilling.
- Create the First Layer: Arrange 18 Oreos on top of the Cool Whip in a 3×6 rectangle. Once arranged, spread a layer of Cool Whip over the Oreos to cover them completely.
- Layer It Up: Repeat the dipping and layering process, alternating layers of dipped Oreos and Cool Whip. You’ll want about 5 layers for a nice height.
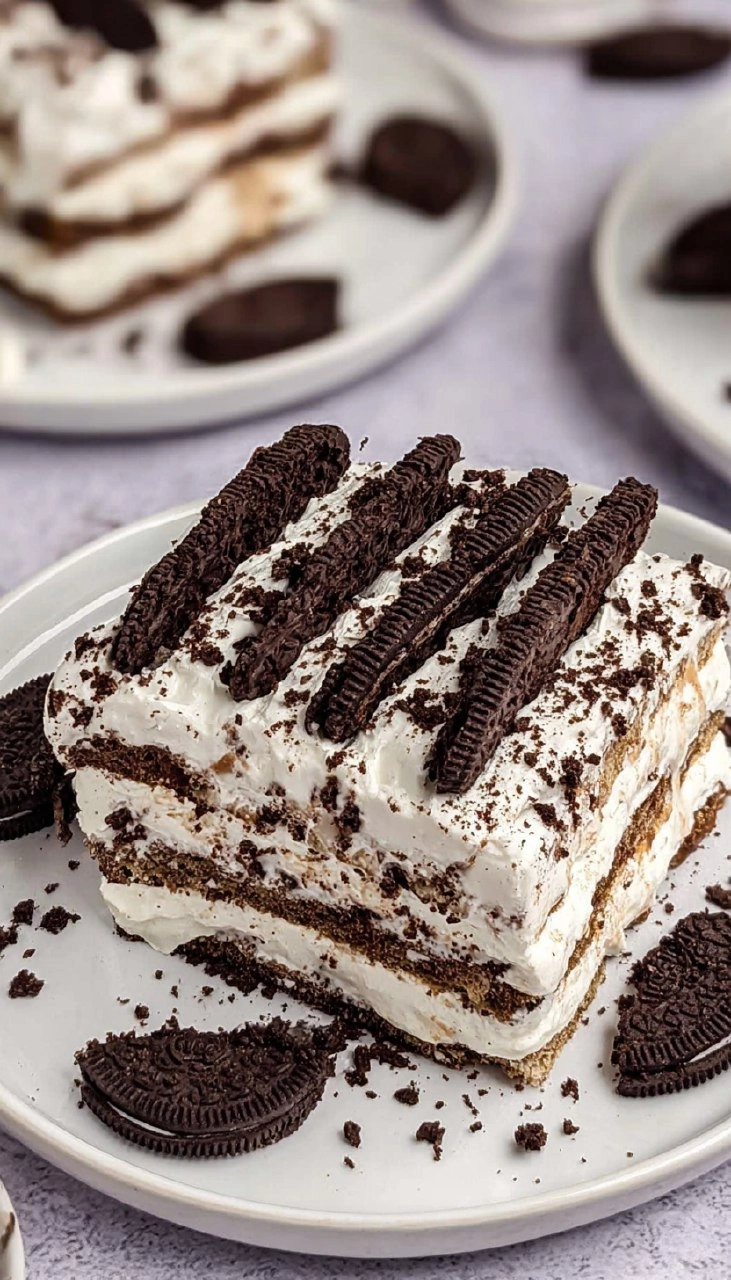
- Final Touch: Once all layers are assembled and the last layer of Oreos is in place, cover the entire cake with a final layer of Cool Whip.
- Chill: Refrigerate the cake for at least 9 hours. This allows the Oreos to soften to perfection.
- Add Finishing Touches: Before serving, sprinkle with crushed Oreos, drizzle with chocolate sauce, or add chocolate shavings for an extra special presentation.
Storing & Reheating
To keep your Icebox Cake fresh, cover it tightly with plastic wrap or transfer it to an airtight container. It will be good in the fridge for about 5 days, but you can freeze it for up to 3 months, just be sure to thaw it in the fridge overnight before serving. Note that the texture will remain creamy, but the freshness of flavors can change, so feel free to refresh it with toppings.
Chef’s Helpful Tips
- Avoid Over-Soaking: Don’t leave the Oreos in the milk for too long; a quick dip is all they need to soften properly.
- Layering Technique: Make sure to spread the Cool Whip evenly to keep the layers distinct and pretty.
- Make Ahead: This dessert is perfect for preparing a day ahead, as it gets better overnight!
- Dressing it Up: Feel free to experiment with different layers—try adding crushed fruit or nuts for an unexpected twist.
- Cutting Your Cake: Use a sharp knife dipped in hot water to get cleaner slices.
The beauty of Icebox Cake lies in its simplicity and versatility. It’s not just a delicious dessert; it’s a base for creativity. You can easily tailor it to your liking, swap Oreos for other cookies, or introduce different flavors of whipped topping. So go ahead, let your imagination run wild!
While Icebox Cake is a classic, it’s a recipe that encourages personal touches and variations. If you enjoy berries, imagine layers of strawberries or raspberries mingled with the creamy Cool Whip. Or if you’re feeling adventurous, how about adding a drizzle of caramel in between the layers? Icebox Cake sets the stage for creative exploration, inviting you to make it your own.
Recipe FAQs
Can I make Icebox Cake ahead of time?
Can I use homemade whipped cream instead of Cool Whip?
What can I substitute for Oreos?
Is Icebox Cake suitable for freezing?
⭐ If you make my Icebox Cake recipe, Awesome! I would love to hear from you. Please give it a star rating and review below! 👇
Icebox Cake
This Icebox Cake combines layers of creamy Cool Whip and soft Oreos, creating a delightful dessert that’s perfect for any occasion. It’s simple to make and an absolute crowd-pleaser, ideal for those who appreciate easy, homemade sweets.
- Prep Time 10 minutes
- Cook Time No Bake
- Yield 12 servings 1x
Ingredients
- 2 cups milk
- 3 (8oz) containers Cool Whip
- 2 (18.12oz) packages Oreos, family size
- Additional Oreos, chocolate sauce or chocolate shavings for decoration
Instructions
- Spread a small amount of Cool Whip on a serving platter to hold the first layer in place.
- Pour milk into a container for dipping Oreos before assembly to soften them.
- Arrange 18 Oreos in a rectangle on top of the Cool Whip.
- Spread a layer of Cool Whip over the Oreos to cover them completely.
- Continue dipping Oreos in milk, alternating layers of Oreos and Cool Whip until assembled.
- Cover the entire cake with a final layer of Cool Whip and refrigerate for at least 9 hours to let the cookies soften.
- Before serving, add crushed Oreos, chocolate sauce, or chocolate shavings.
Notes
Ensure to use family size Oreos for the best results.
Allowing the cake to set overnight enhances the flavor and texture.
Feel free to customize the decoration based on your preferences.
Nutrition
- Serving Size: 1 slice
- Calories: 250
- Sugar: 15g
- Sodium: 180mg
- Fat: 12g
- Saturated Fat: 6g
- Unsaturated Fat: 4g
- Trans Fat: 0g
- Carbohydrates: 30g
- Fiber: 1g
- Protein: 3g
- Cholesterol: 15mg
Nutritional information is an estimate. The nutritional values for your final dish may vary based on measuring differences and products used.